
GETTING STARTED
BUILD YOUR MAPPERS
NEW CHAPTER
STEP 1: APPLY TO JOIN YOUTHMAPPERS
First, check to see if your university already has a chapter of YouthMappers using our directory and map. YouthMappers chapters are considered open to all university students across academic departments and only one chapter per university campus will be approved. Universities with multiple campus locations can have a separate chapter at each location.
-
Please read our Terms of Participation to better understand the program
-
Consult the Frequently Asked Questions
-
Review the YouthMappers Ethics Statement
-
Review the YouthMappers Branding Policy and Logo Use Statement
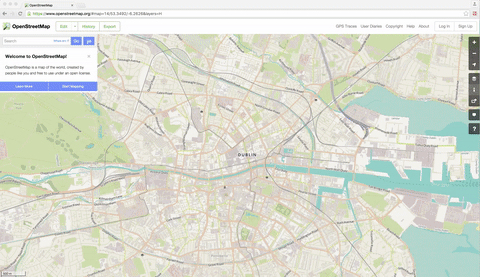
STEP 2: MAP YOUR CAMPUS
Start Mapping
Starting to map in an area that is familiar to you, is always a good way to get started.
-
Create an account
-
Search for and zoom into your campus community
-
Click "Edit"
-
Click on "Start the walk through"
-
Start to contribute infrastructure to your campus environment
STEP 3: PARTICIPATE IN YOUTHMAPPERS
Participate in a YouthMappers mapping task
Now that you have gained some experience mapping in an area that is familiar to you, it's time to participate in a YouthMappers task. These tasks, which are featured on the Projects page, align with the geospatial data needs of USAID programs abroad and campaigns organized by our partners.
-
Go to the Projects tab on this site
-
Browse the featured tasks and click on the link to Map the Task, and you will be directed to the Tasking Manager
-
You can also go to the HOT Tasking Manager directly and search for tasks. Read through the instructions (which often includes video links)
-
We encourage chapters to create unique change-set comments. Watch this video to learn how to create a change-set comment. Remember to tag your edits with #YouthMappers. For additional support as you start mapping, visit the Resources page on TeachOSM.org or visit the YouthMappers Resource Library - Mapping Toolkit.
GETTING STARTED
BUILD YOUR MAPPERS
EXPERIENCED CHAPTER
STEP 1: HOST A MAPATHON
Share your remote mapping experience with new mappers

Once you have practiced contributing to YouthMappers tasks on the HOT Tasking Manager, host your own mapping event. Mapathons are mapping parties, where groups of mappers gather together over a mapping task (usually over refreshments, and music), and teach new mappers how to map in OSM.
If the group is small, this can be done in an informal way, with more experienced mappers working with groups of 2-3 newcomers. If you have a larger number of attendees, it is best to have a formal training presentation, that introduces both the task to be mapped, and the mechanics of working with OSM data.
Some things to consider:
-
Create a digital invite so that you can plan for the layout of your room, and any food or refreshments
-
Make sure you tell your attendees to bring a laptop and mouse (if your space does not have computers)
-
Have extra power strips for laptop users
-
-
Create a training powerpoint for the event, based on the task you choose (see here for an example)
-
Designate a front of room instructor, and 2-3 experienced mappers to walk around the room, to work with new mappers
-
Have handouts with a brief overview of the tasks, and task numbers
-
Make sure the Wifi is ready to handle the extra traffic, and that the login steps/credentials are visible
-
-
See the MissingMaps website for an excellent checklist for Mapathon events
-
Review the OSM Wiki Beginner's guide for best practices
-
Remember to organize a plan to validate the changesets from your mapathon!
STEP 2: FIELD PAPERS
Validate your remotely mapped edits in person

Starting to map in an area that is familiar to you is always a good way to get started. Now that you have experience using the remote mapping tools, you should explore mapping in the field, at a local destination using Field Papers.
Field Papers is a tool to help create a multi-page atlas of any place in the world. Once you create an atlas using fieldpapers.org you can print it, take it into the field, and record notes, changes and observations about the area you're looking at.
When your fieldwork is complete, you can use the QR code on each page of your field atlas to upload your pages to one of the OSM editors, and incorporate your changes into the live OSM map.
GETTING STARTED
BUILD YOUR MAPPERS
MAP MASTERS
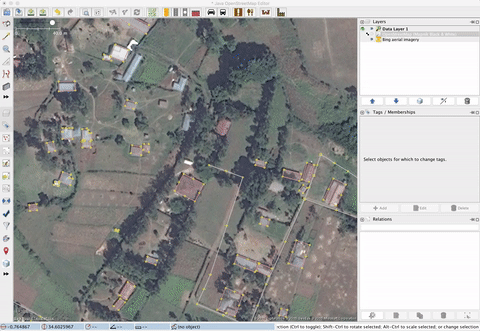
STEP 1: HOLD A JOSM TRAINING
Java OpenStreetMap Editor
-
Have your training coordinators install JOSM
- To install JOSM, visit the JOSM homepage
- To learn how to use JOSM, see the following resources:
-
LearnOSM have a guide called Getting Started with JOSM
-
Mapbox has a wonderful illustrated guide for first time JOSM users, called Your first steps with JOSM
-
TeachOSM has a guide for learning to use JOSM
-
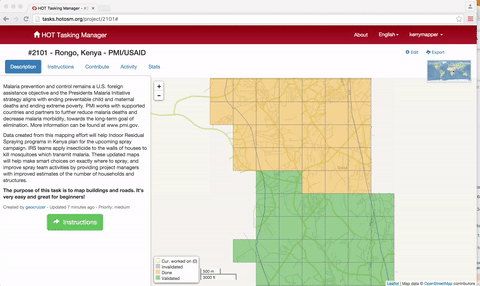
STEP 2: BECOME A VALIDATOR
Validate existing work in OpenStreetMap
While new data is always excellent, it is equally important that we monitor the quality of the existing data in OpenStreetMap, that's why we encourage experienced mappers to work as validators on tasks.
-
Visit the HOT tasking Manager, and search a YouthMappers Task (also on the Projects page of this site)
-
Click on a task that has a high level of completion (yellow bar)
-
Cells that have been mapped once are marked in yellow.
-
Cells that have already been validated (rechecked for errors) are marked in green.
-
-
To validate a yellow cell, click on it, and opt to "Review Work".
-
You have the option to review the work in either iD or JOSM
STEP 3: CREATE YOUR OWN PROJECTS
Create your own projects in the TeachOSM Tasking Manager
If your chapter would like to create and manage your own projects, similar to the ones you see listed in the HOT Tasking Manager, there is an alternate tasking manager for such purposes.
The TeachOSM tasking manager was created so that teams of experienced OSM contributors, could create and manage their own projects. The TeachOSM tasking manager has the same look and feel as the HOT tasking manager, but the tasks are not specific to the humanitarian community. It is a "sandbox" tasking manager for instructors, even student instructors, such as the training coordinator of your chapter, to use for collaborative projects.
You can find the TeachOSM tasking manager linked here.
To request project manager privileges for the TeachOSM Tasking manager, please email info@teachosm.org.